
Setting up a print job for the manually-led inspection in iX mode
-
Start the software by double-clicking on the EyeC ProofRunner
icon on the desktop.
 The start screen appears.
 -
Choose 1 of the following options:
- Enter the job data in the acquisition screen. See (1) in the following figure.
- Load a PDF template that can be used as a reference file for the reference sheet. See (2) in the following figure.
- Create a reference sheet manually by selecting the
 button.
See following figure.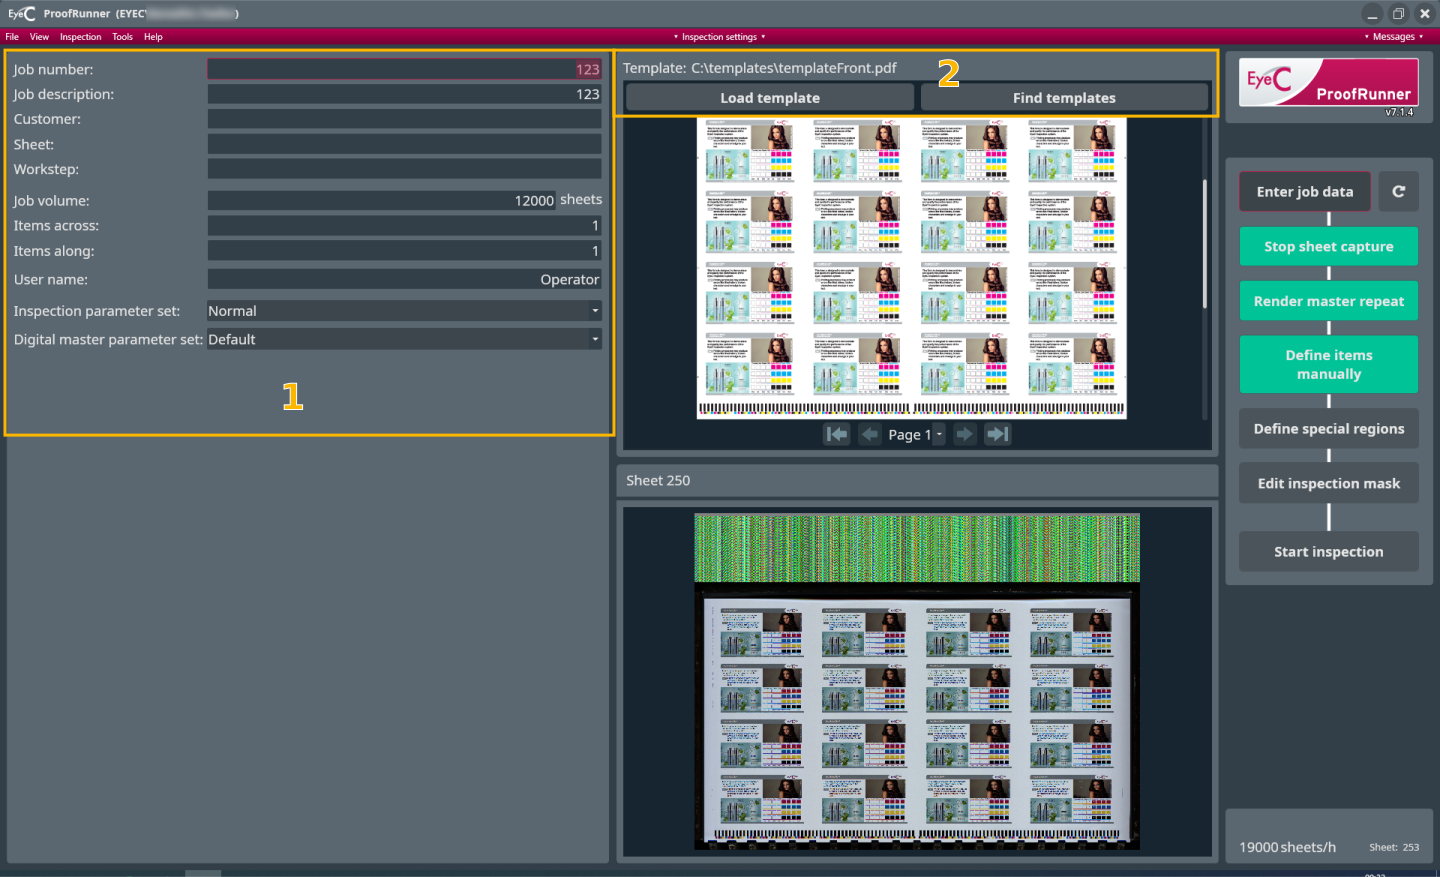
Figure 1. EyeC ProofRunner - Start screen iX mode with job data Table 1. EyeC ProofRunner - Start screen iX mode with job data Number Description 1 Input fields for job data. These are customer-specific and may differ from the following list: -
Job number: Input field for the job number
-
Job description: Input field for the job description
-
Customer: Input field for the customer’s name
-
Job volume: Input field for the print run
-
Items across: Input field for the number of copies per sheet that are directionally landscape
-
Items along: Input field for the number of copies per sheet that are directionally horizontal
-
User name: Input field for the user’s name
-
Inspection parameter set: Drop-down menu for the selection of inspection parameter sets
-
Digital master parameter set: Drop-down menu for the selection of qualification parameter sets. Select the parameter set that corresponds to the material you are going to use for inline inspection.
2 Buttons to find or load the PDF template
Should a PDF comparison of the reference sheet be made during the inspection process, the corresponding file can be loaded. An electric proof is necessary to set up an inspection. This electronic proof must be a prepress PDF of the sheet to be printed. This is used to create a reference that each production sheet is checked against. To find or load a PDF, click on the respective button. After loading a PDF, it is automatically rendered into a reference image.