Starting the EyeC ProofRunner software

Start the print machine with the main switch.
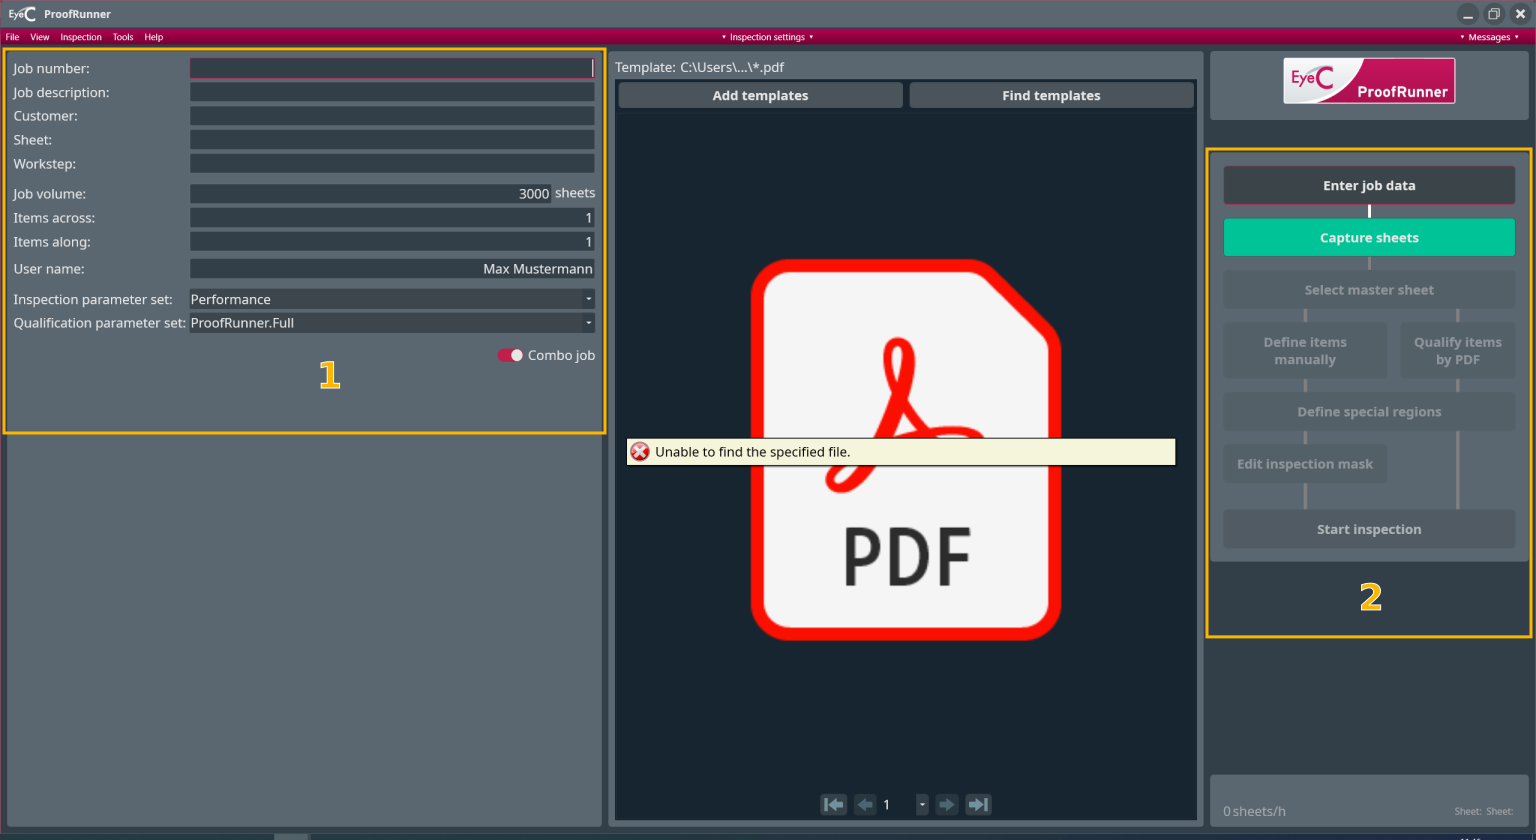
The camera system on the machine automatically turns on. The PC and the software automatically start up. The start screen of the EyeC ProofRunner software appears.

Start screen
Table 1. EyeC ProofRunner start screen
Number Description
1

Dialog field for job data:

  • When the print machine is ready, the job data of the print job is automatically entered from the control system of the print machine.
  • If there are no jobs, the corresponding job data can be entered manually here. See The manually-led inspection process.
2

These buttons represent the workflow from top-down and in chronological order.

Automatic mode:

In automatic mode, it is not necessary to click any buttons. The print inspection begins running automatically. It is possible that while in automatic mode, you can switch between modes manually by clicking on the buttons at any time. The software also reacts automatically to external signals.

Manual mode:

In manual mode, you can navigate through the inspection process. See The manually-led inspection process.

  • The green highlighted buttons are clickable and indicate the next possible step(s) in the process.
  • Dark grey buttons cannot be clicked.
  • Light grey buttons can be clicked on for the purpose of repeating a previous step.
Figure 1. EyeC ProofRunner start screen