
Setting up measuring regions
Every measurement region consists of 2 areas that are used to stabilize the measurement. Each region has an anchor point to define the start and the end point of the measurement. You can measure distances in the following ways:
- Horizontally
- Vertically
- Horizontally and vertically
- Euclidean
-
To set up measuring regions, select the double arrow.
See following figure.
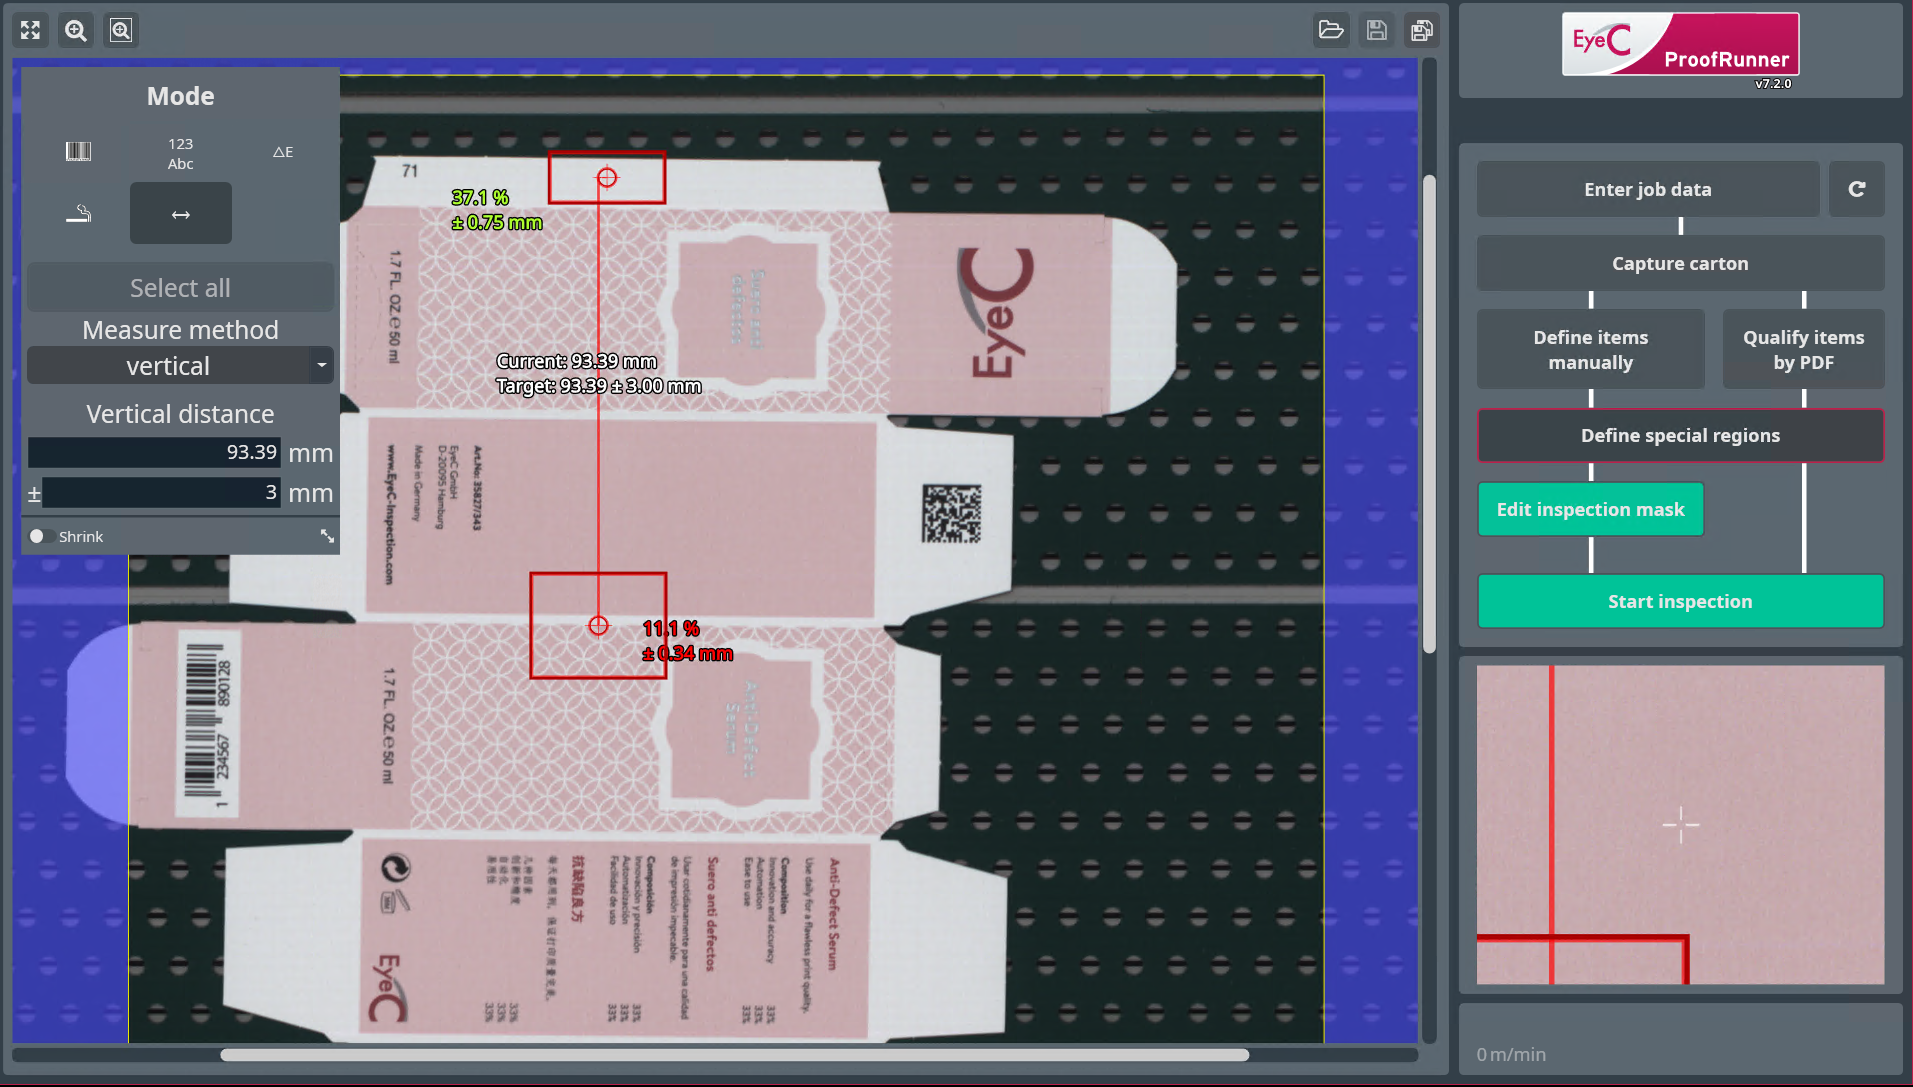
Figure 1. Setting up distance measuring (in this figure shown on a carton) -
When the 2 rectangles have been spanned, a dialog opens for you to set up the
initial values of the measurement.
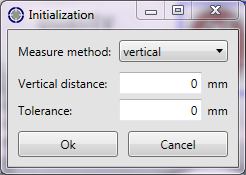
Figure 2. Distance measuring initialization dialog -
Choose the measure method and a tolerance value (in mm) and click
OK.
The region is created. The suitability is shown next to the regions. A green number indicates a very suitable value. A dark red number indicates a not suitable value. If you have set up regions for distance measurement, during the inspection the actual value for each distance measurement is displayed in the special region list below the image of the inspected sample. If the distance measurement is out of bounds, it is marked orange. You can even adapt the thresholds of the measuring during an inspection by clicking at the item with your right mouse button.

Figure 3. The suitability is displayed in colors from green (good) to red (poor) 
Figure 4. Actual value for distance measurement during the inspection