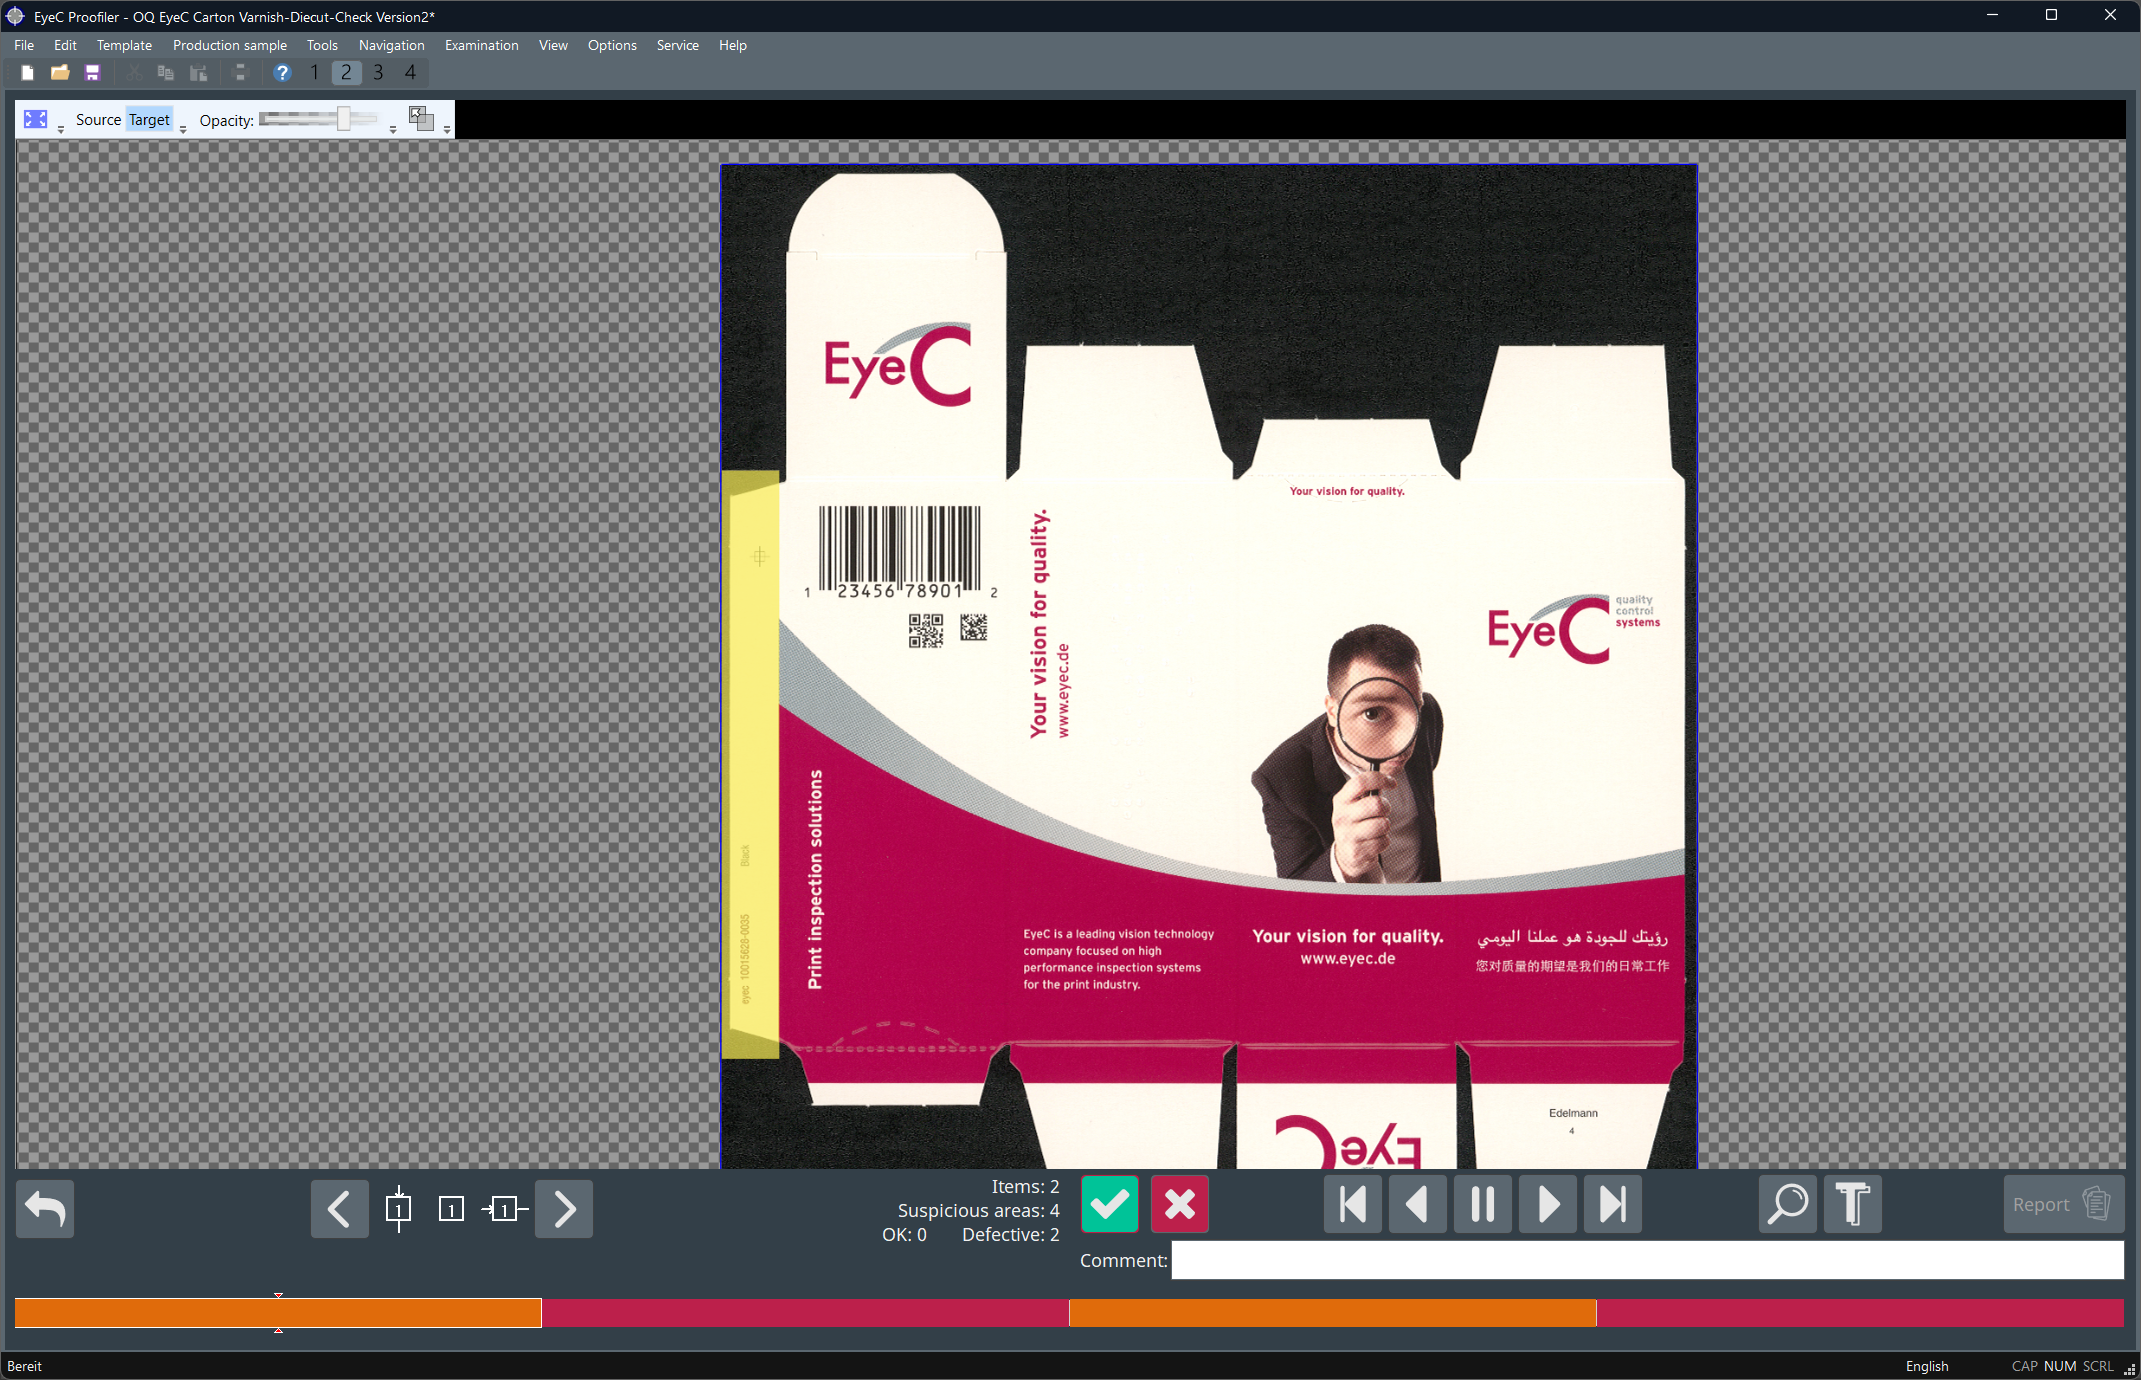
Open the Varnish & Die Cut check view by clicking on the last segment of
the progress bar.
See following figure. Figure 1. Varnish & Die Cut check view
In the Varnish & Die Cut check window the sample is displayed. This
image of the sample is overlayed by an in the PDF configuration settings defined
layer of the PDF proof, for example, cutlines or varnishes.
You can check the sample for correct placement of, for example, the cutline by
clicking on the overlay, holding the mouse button, and moving the overlay over
the sample image.
In the overlay window there are some tools to adjust the view.
Figure 2. Tools for optimizing the display
With the blue button on the left you can fit the images into the view
(for example, if you have shifted the overlay out of the view).
With the Source and Target button you can choose if either the
sample overlays the overlay layer or if the overlay layer overlays the
sample (normal case).
The opacity slider is for adjusting the opacity of the overlay
layer.
And with the right most button you can reset your movements of the
overlay layer.