Carrying out the inspection process
Note:
As soon as the first Item has been inspected, you are ready to start grading suspicious areas. It is also possible to start the grading before the inspection is completed.
-
Start the inspection process by clicking on START examination on the
acquisition screen after retrieving customer proof and production
sample.
-
At the end of the inspection process, the progress bar reaches the right side
of the screen and all items have either a green or an orange frame around them.
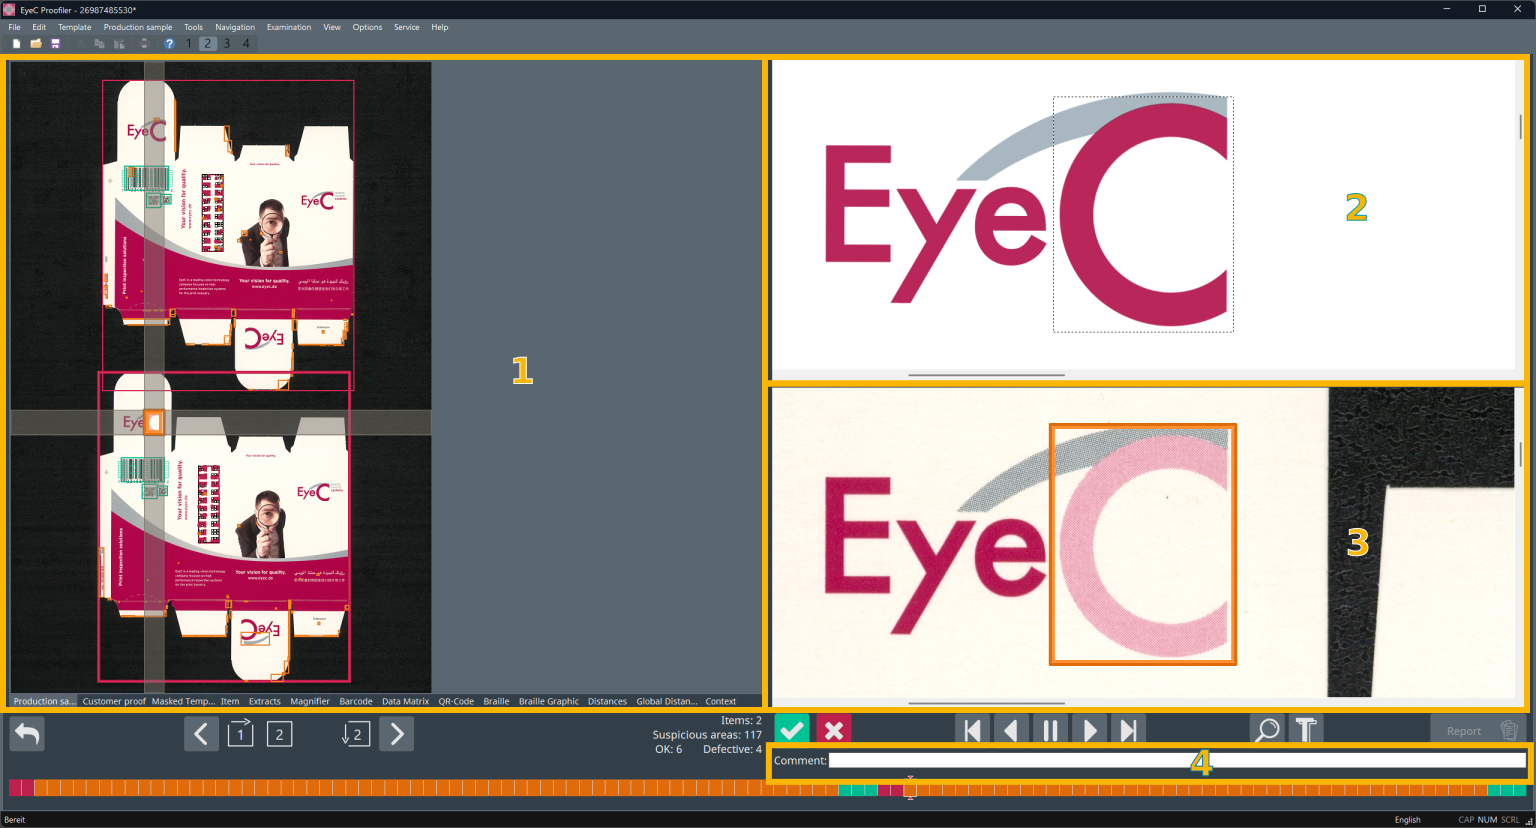
Table 1. View after automatic inspection Number Description 1 Production sample. 2 Customer proof close-up. 3 Deviation close-up. Final suspicious area is displayed magnified. 4 Comment field for entering a comment to any deviation. Figure 1. View after automatic inspection -
To examine the difference between a suspicious area and the corresponding area
of the proof more closely, click on and hold the Toggle button.

-
If the deviation in the suspicious area is insignificant and acceptable to the
customer, click on the Good button.
 The suspicious area is marked green and the next suspicious area is automatically selected.
 -
If the deviation in the suspicious area is unacceptable to the customer, click
on the Defective button.
 The suspicious area is marked red and the next suspicious area is shown.
 -
The comment field above the progress bar allows you to enter a comment to any
of the suspicious areas.
The comments are added to the report.
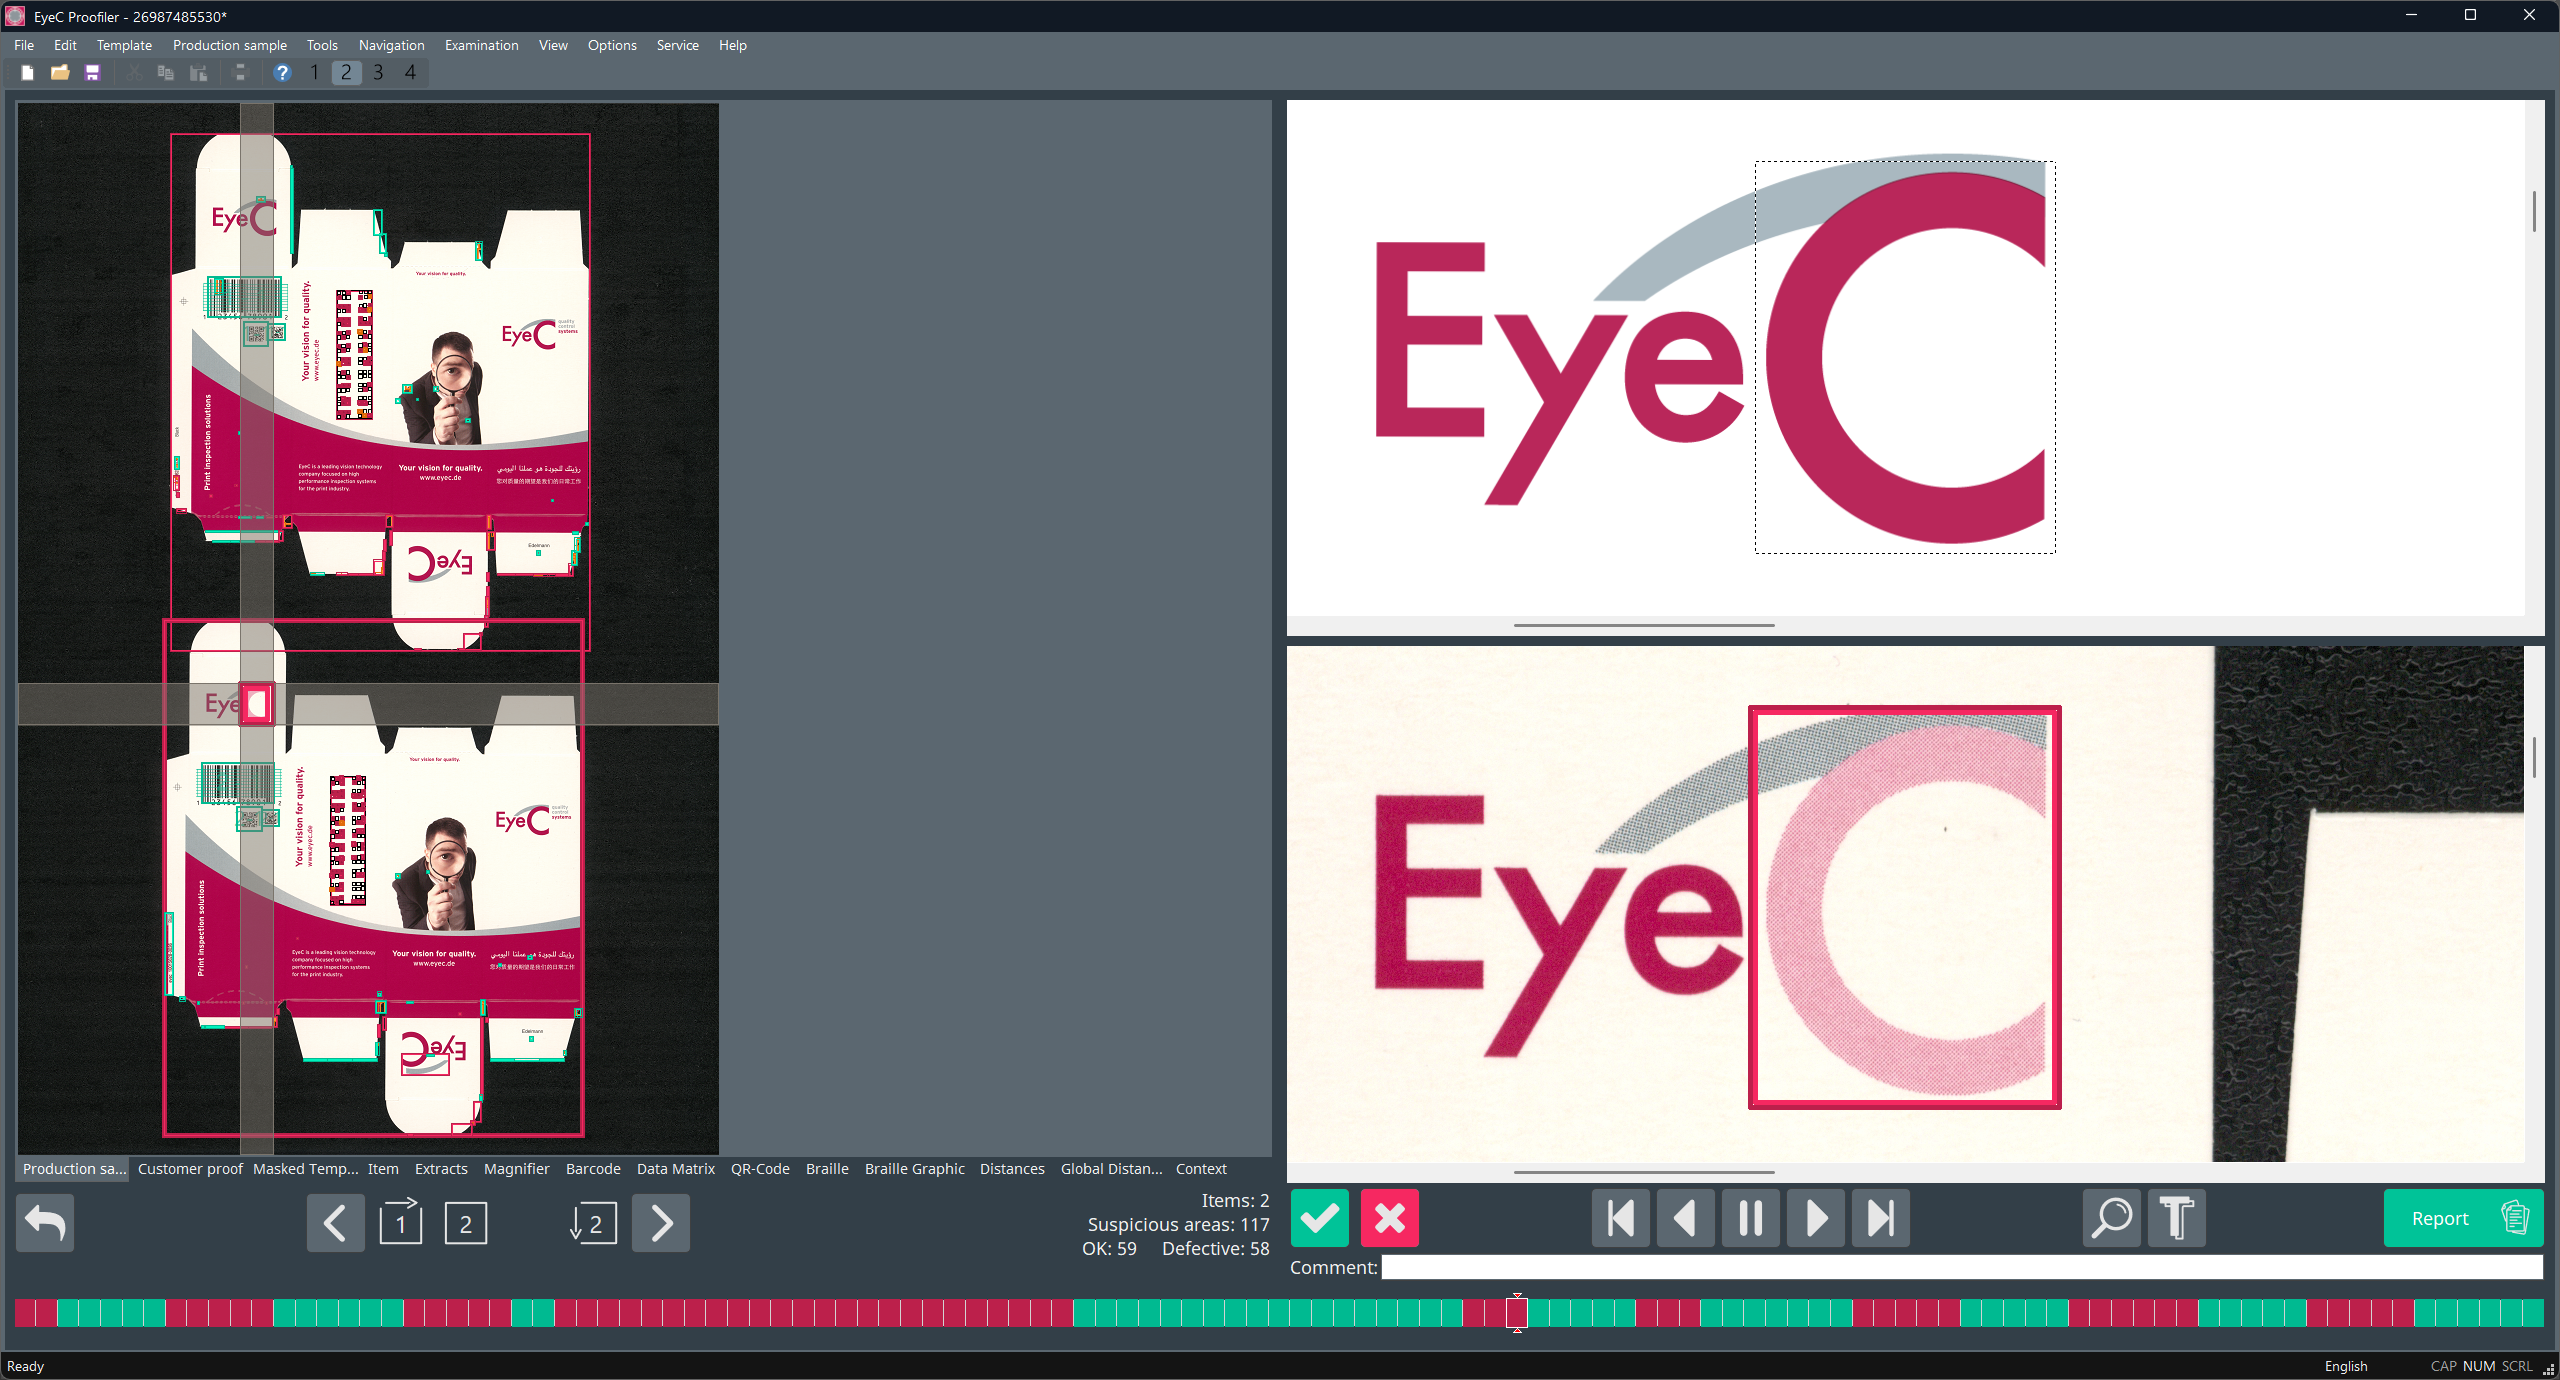
Figure 2. Examination screen after evaluation