
Setting up the reference image without a PDF and defining the inspection area
-
Click the Define items manually button.
 A mask with a red border appears. Small blue squares appear along the edge of the mask. Each item is marked by a yellow border.
 -
Adjust the outer border of the mask to cover the area you want to inspect by
clicking and dragging the blue squares towards or away from the center of the
mask.
Everything outside of the mask (indicated in blue) is ignored during inspection.
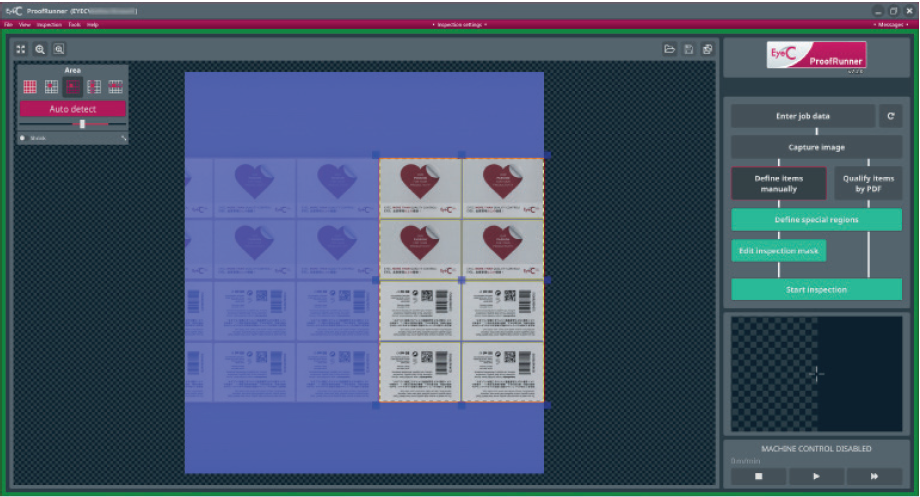
Figure 1. Job setup screen - Define items manually Note:To move the mask as a whole, click and drag the square located in the center of the mask.
-
If you used the option Edit single item, repeat step 3 and step 4.
See following figure.
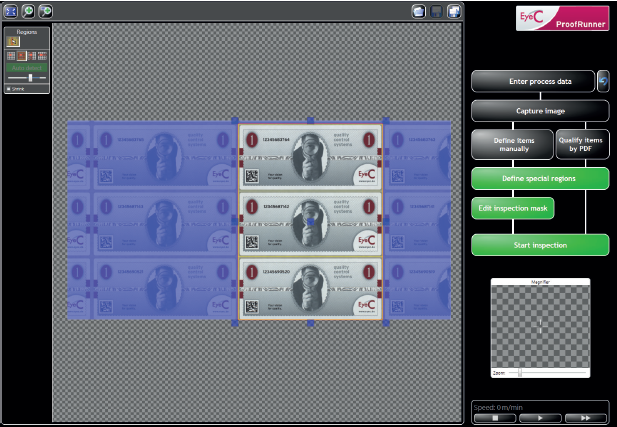
Figure 2. Job setup screen - Modifying space between units. The Zoom tools are located at the bottom right and the top left of the computer screen. They help you define the mask more precisely.
For more editing options, see Editing the inspection mask.