
Editing the inspection mask
In some cases, you may want to remove certain areas within the inspection mask from inspection. The Edit inspection mask option allows you to define the inspection area to meet your needs.
-
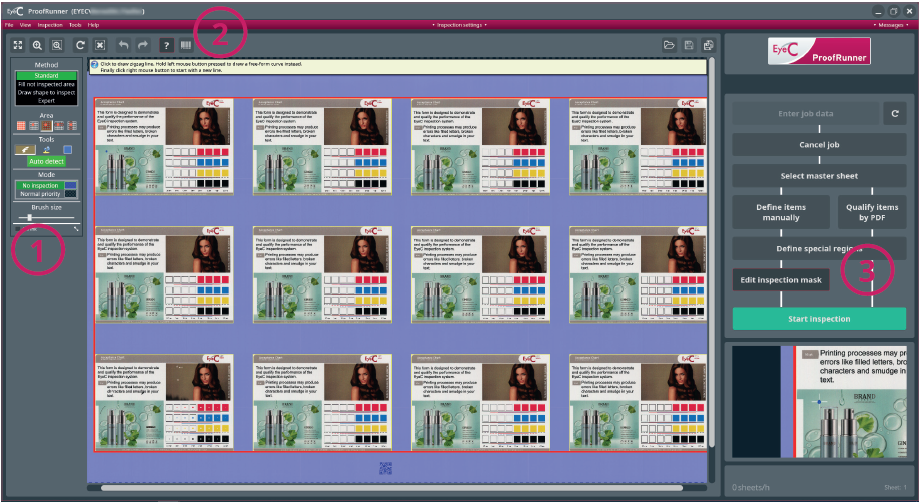
For editing the inspection mask, click Edit inspection mask.
The screen changes. Tools for editing the inspection mask appear in the upper-left part of the screen. For further information on the different methods of editing the inspection mask, see the EyeC ProofRunner System Manual. Moving the mouse over individual tools opens an explanation of the respective tool. Editing the mask is performed on only 1 copy you select by clicking on it, and then automatically transferred to all other copies. A non-inspected area can be selected by clicking, holding, and pulling a rectangle. The area which is not to be inspected is then marked blue.
Button Description 
Resets the inspection mask to its original state. 
Undoes all changes in the inspection mask. 
Undoes the previously performed action. 
Redoes a previously undone action. -
Once you have defined the mask, you are ready to start the inspection by
clicking on the Start Inspection button.

| NOTICE | |
|---|---|